Tuesday, April 30, 2013

Name Cards for the tea party....

Here are the name cards I made for my Mother's day Tea table.


I started out using a Peekaboo punch out from Stampin' Up. ( These are made to be lifted up, so you can see what's underneath, but I used it in a different way...see below)


I used the same velum that I put on the tea lights, and cut out little squares...


I put the velum BEHIND the scalloped edges, in front of the flip up flap....


I then glued down the velum using Scotch, Quick Dry adhesive.. just a thin line of beads along the outter edges of the velum...


I then grabbed some self adhesive letters and had fun with the names....


I scored the back of the punch out to bend backwards, and use it like an easel, so they are free standing!


The theme of my table is Alice in Wonderland, but it's the Mad Hatter's Tea Party, so, one of the puzzles, is trying to find your spot by unscrambling the letters!! :) Thought it was a fun addition to add to the wacky ways of the Mad Hatter!! 


Monday, April 29, 2013

Quick and Easy Decorated Tea Lights

Quick and Easy Decorated Tea Lights

I needed to decorate these battery operated tea lights for a Mother's Day Tea. I forgot I had these, and then realized I had no candle holders to put them in, so I decided to just decorate them with materials I already had at home! 


Here's what I used.....
Rhinestones and metal embellishments from Miriam's Crafting Supplies. ( I have her link at the below)
I needed glue dots, scissors, velum, my heat tool, glue gun and glue sticks, used my ATG ( tape runner gun thingy)  and my Scotch glue bottle to bend the metal pieces.


So.. I started out with these little tea lights.... and a 12x12 sheet of velum...


 I cut the velum into strips and used my ATG to run adhesive along the bottom and up one side. I stuck it directly onto the tea light.


 Her's where I did something I'd never done before.. after trial and error.... I figured out, if I add beads of hot glue to the metal pieces and let them dry, I could cut them down and clean up all the little glue strings off to make a very clean area to add the rhinestones to. Trimming the beads of glue while dried, allowed me to add the stones, without rushing, but also without the hot glue oozing out from underneath.

I used my heating tool to heat up each one, one at a time, to melt the glue again.... 


 I used a book binder clip to hold it while I heated it up.... and because this charm is metal, it really held the heat nicely, and left the glue pliable enough to allow me to make sure each stone was on straight, and move if needed.


 So, here is a close up of the charms and stones that I used.


 Both charms and stones....... the clear rhinestones are 7mm and the colored ones are 5 mm, all flat backs....
( check them out below on the links provided, I get them for ridiculously low prices from Miriam!!)

 All finished with the 8 of them.....


 I used my glue bottle as a template.. I bent these around the glue bottle so they would fit onto the tea lights.....


 I then used a glue dot to adhere the charm onto the tea light...


 Here are all of them finished before adding them to the tea lights....


AND.. the grand finale..... 8 tea lights, that will be party favors as well, minimal effort, and they only cost about $4 to make all 8, and that is including ALL materials!!


Miriam's links:


Wednesday, February 13, 2013

Tape Deck Rack Repurposed!

So.... I wanted to bring these tape deck racks home to use for my ink pads like I see a bunch of my crafty friends doing. I quickly realized I have nowhere near as many ink pads as they do! lol. However, I AM a ribbon hoarder!! I'm always going out to get THAT ONE color I NEED for a project. Too lazy to go through the totes I have my ribbon in I guess.... so I buy a new spool, and it get's thrown into the tote with the rest of them!
I thought to myself, what can I do with these racks... and BAM! It hit me... I grabbed a spool to see if it would fit... and it did! SOOO... I stayed up all night and went through my box of ribbon and organized it all by color. ( the larger spools didn't fit, so I took them off of the spool before putting them in the rack) I really like it, and it actually takes up LESS room than the 3 totes I have had these it. Cleared off a whole shelf now! WOOHOO! ;) hope this gives you an idea if you have one of these oldie, but goodies!! Now I can see EXACTLY what I have and actually USE it!

In the other one, I used it for my ink pads, but then found a bunch of other little things to add in there, like my Stickles! I filled it up pretty quick, but just LOVE how I can see everything, and yet, it all is contained, with out having a million containers!!

Hopefully this will give you an idea if you have one, and don't know what to do with it!


Tuesday, February 12, 2013

WINNER OF THE 100 FOLLOWER GIVEAWAY

DRUMROLL PLEASE..........


CONGRATULATIONS WENONA RIGALI!!!

Random.org picked number 85, and that's you Wenona!!!!


Keep sharing, I'll post a picture of the next giveaway when we reach 150 followers!!! Thank you to ALL of you who made this possible! You all are awesome!!

Jenny! ;)

Sunday, February 10, 2013

It's GIVEAWAY time!!!!


All of my wonderful friends, family, and followers..... pass along the info to win this amazing prize when I reach 100!!!
The sooner you share on Facebook, the more people will see, and that means more followers!! So let's go people... who wants to win all of this?!?!?


Here are the requirements.....

All you have to do is follow me and leave a comment!!! Once I reach 100, I will randomly pick from ALL of my followers to win this prize!! ( I'll post a reply on your comment, letting you know that you've won!) If you already follow me, please leave a comment so I can let you know too!! Stay tuned..... there will be another giveaway when I reach 150!!! 


Thanks so much, and GOOD LUCK!!!


Welcome to “Angela’s 30th Birthday” Hop! So glad you can join us!

12 super crafty girls would like to share with you their birthday creations. Hopefully this will give you all some inspiration to make something for that upcoming birthday!

If you are coming from , Ashley - http://thebloghopprincess.blogspot.com then you are in the right spot. If you just happened to stumble upon my site, please start at Angela’s so you don’t miss anyone’s amazing projects!


Here's my project. This is a Bambi birthday card for a friend that LOVES Bambi!

What I used: EK Success Bambi stickers, Bazzill Wings bitty blossoms, Stampendous! sunflower stamp, stamped in Tim Holtz Walnut Stain ink, light green ribbon, and mixed cardstock.  I used a generic HB stamp, and heat embossed with Martha Stewart embossing powder.


Your next stop is Teresa-http://freshandrenewed.blogspot.com/

There is tons of blog candy along this hop! All you have todo is become a follower of every person in the lineup, and leave them acomment.

AngelaCorcoran
My Mind’sEye album set

LisaWoodward
$50worth of yummy crafting goodies!

TheresaDetloff
$15 GCto Michaels
&
$15 GC to Joanne’s!

You may be surprised....you might find more along the way! 


Here isthe entire line up in case you get lost along the way:


Thank you for helping us celebrate Angela’s 30th Birthday!


Sunday, January 27, 2013

The Mad Hatter's Tea Party!


Welcome to The Mad Hatter's Tea Party. If you happen to fall in the rabbit's hole you have landed in the wacky wonderful world of Alice where we're all mad here! The March Hare is scurrying and hoping you won't be late in attending and wishing our hostess a Happy Birthday!!! She does love celebrating her birthday and what better way than to have a tea party with all of her favorite friends in this Wonderland!!!!

There are some wonderful sponsors today to help us celebrate:


Rick St. Dennis has some fabulous digi's and he is offering three of these to one lucky winner. You can fine him at http://rickstdennis.blogspot.nl/
and he asks that you become a follower. 


The Stamping Chef at http://thestampingchef.oo.gd/index.php?route=common/home isoffering 3 digis to help you cook up something special to one lucky winner


Treasure Box Designs at http://www.treasureboxdesigns.com/,is offering $15 in free files to one lucky winner by going to the Design TeamBlog Page (http://treasureboxdesignteam.blogspot.com/)and following along with following on the FaceBook Fan Page (https://www.facebook.com/pages/TreasureBoxDesigns/169444103106015)

Here's my project which I hope you enjoy <insert project and recipe here>

 
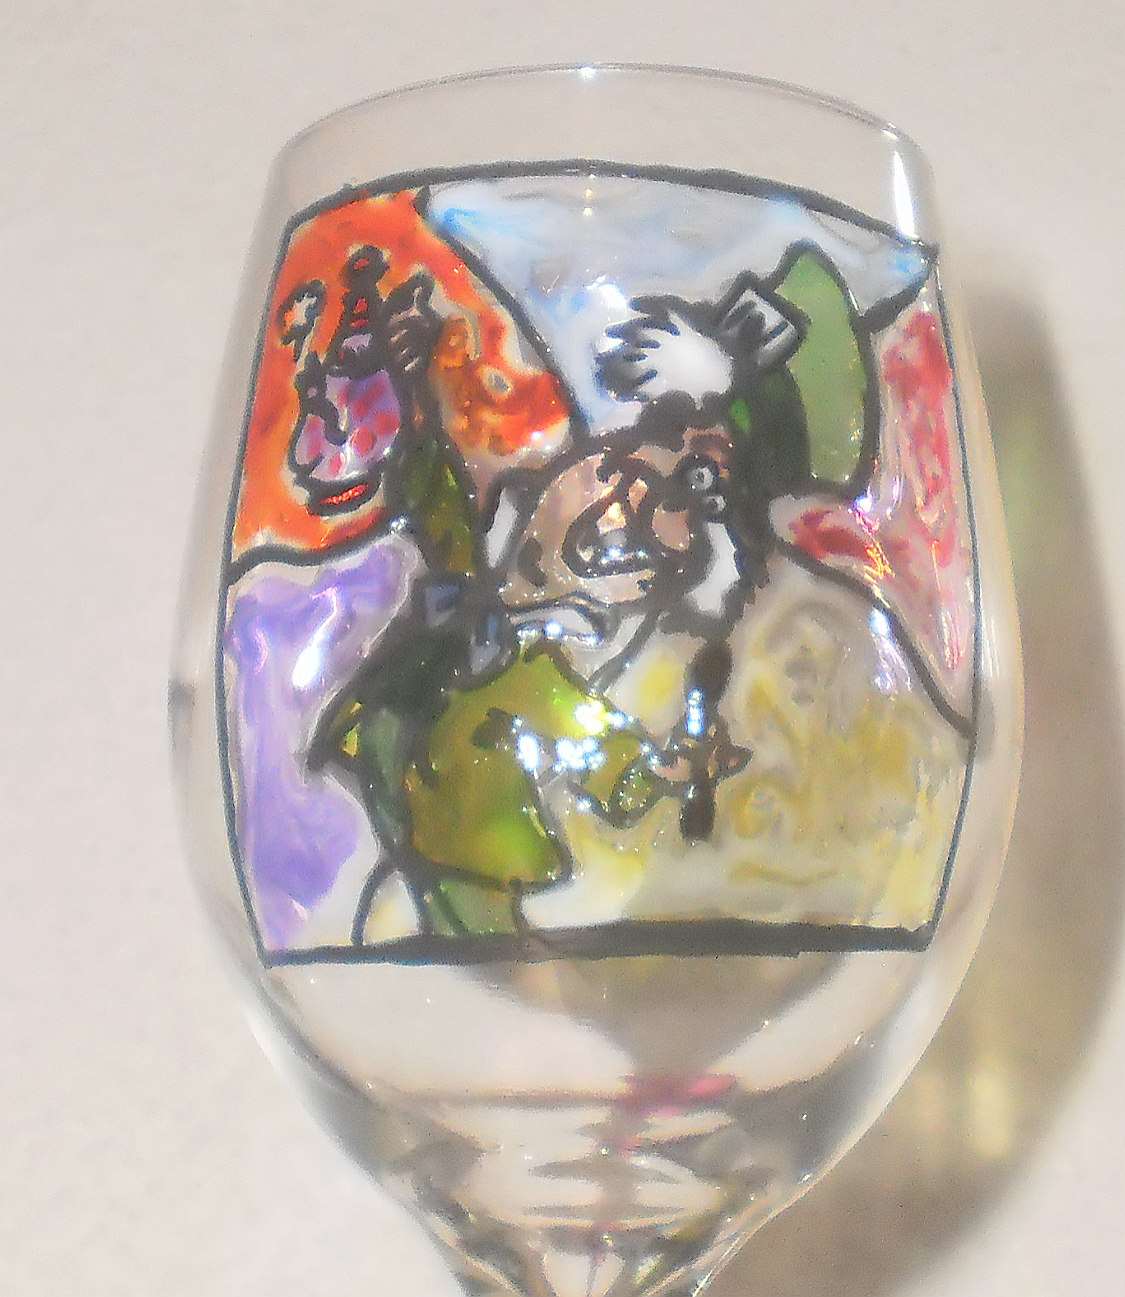
Here's my project. 8 stained glass wine glasses. I used Glass Stain by Deco Art.
 
Step 1: I got 8 wine glasses, drew the image on the glass with a sharpie. I printed out pictures to use as a guide.


Step 2: I used Liquid Leading, to trace the image. This allows it to look like a real stained glass window, with the raised black lines. ( Also helps keep the stain with in the lines while wet.)


Step 3: Color. I would heat set ( with my heat gun) each color to prevent dripping while moving the glass around.


These have to cure for 2 weeks to make sure it's completely dry, in order to use them!
Hope you enjoyed my project.


Blog Candy: For those of you that sign up to follow my blog and comment on the giveaway ( I only need 22 more for the giveaway drawing!!), I'll add your names to a drawing to win a Valentine's Day surprise for this hop! If you're already following AND commented on the giveaway before today, just leave me a comment here telling me you did so already! I'll still add your name to the drawing for this hop's blog candy! Thanks and good luck!
 
Thank you for stopping and enjoying a cup of tea and perhaps crumpets with me! Your next stop along the party hop is Pam ~    http://www.scrappinfabpam.blogspot.com/  or just follow the March Hare and don't be late for every important date!


Here's the full line up again, just incase the Cheshire cat gave you the wrong directions and you're still lost, trying to find your way back home....


  1. Lynne ~ http://slasewcraftiness.blogspot.com/
  2. Camille ~ http://shortonideasaz.blogspot.com/
  3. Jennifer ~ http://wunderscreations.blogspot.com
  4. Vicky ~ http://crafting-vicky.blogspot.ca/
  5. Janet ~ http://www.ladyluvbug.blogspot.com/
  6. Jearise ~ http://lorbysworld.blogspot.com
  7. Jenny ~ http://cccjalessi.blogspot.com/
  8. Pam ~    http://www.scrappinfabpam.blogspot.com/
  9. Edwina ~ http://edwinascreations.blogspot.com/
  10. Kimberly ~ http://scrappingrookie.blogspot.com 
  11. Anita ~ http://anitaandbugs.blogspot.com/